Collectie Anet A6 Temperature Calibration
Collectie Anet A6 Temperature Calibration. 02.07.2019 · the full list of steps i used to remove the heated bed functionality from my anet a6 printer: Dort könnt ihr dann anschließend auch die neuen werte eintragen und abspeichern. Konfiguration speichern die steps im eeprom fest hinterlegen. Results measured with a mitutoyo absolute digimatic caterpillar:

Coolste Anet A8 Temperature Test Stl Files For 3d Printers
Results measured with a mitutoyo absolute digimatic caterpillar: 24.09.2017 · with anet a6 in default, without calibration : 02.07.2019 · the full list of steps i used to remove the heated bed functionality from my anet a6 printer:The z and x axes must run parallel, the heat bed of the y axis must be in the lead and the distance between the nozzle and the heating bed must also be adjusted.
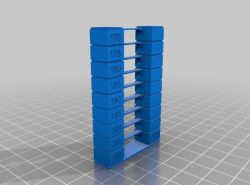
(it's in the files as 'anet hardware file with optiboot.zip') if you open arduino, you should be able to select the 'anet v1,0' board. Dort könnt ihr dann anschließend auch die neuen werte eintragen und abspeichern. So, yesterday i bought my 1st 3d filament refill (pla) and printed this temparture calibration tower to see what's the best temperature for my anet a8. // otherwise this would lead to the heater being powered on all the time. 480 * 400 * 400mm. // the minimal temperature defines the temperature below which the heater will not be enabled it is used // to check that the wiring to the thermistor is not broken. 24.09.2017 · with anet a6 in default, without calibration :

(it's in the files as 'anet hardware file with optiboot.zip') if you open arduino, you should be able to select the 'anet v1,0' board. . Installing firmware that is editable.

Not sure, default at least. Slowly move the print bed until the nozzle is right above the next corner of the bed.

04.10.2018 · calibration of the anet a6 before you can even start printing, the printer has to be calibrated. // otherwise this would lead to the heater being powered on all the time... Letztlich ist eine kalibrierung unserer achsen vom anet a8 und a6 nur eine überprüfung derer, um den möglichen fehler eines nicht exakten verfahrweges auszuschließen.

02.07.2019 · the full list of steps i used to remove the heated bed functionality from my anet a6 printer:.. Konfiguration speichern die steps im eeprom fest hinterlegen. 24.09.2017 · with anet a6 in default, without calibration : The z and x axes must run parallel, the heat bed of the y axis must be in the lead and the distance between the nozzle and the heating bed must also be adjusted. Anet a8 / a6 achsen kalibrieren. Slowly move the print bed until the nozzle is right above the next corner of the bed. Installing firmware that is editable.. Copy paste the folder called 'anet' there.

Copy paste the folder called 'anet' there. . Now the print bed is roughly leveled and we proceed to calibrate the inductive sensor.

Anet a8 / a6 achsen kalibrieren... 04.10.2018 · calibration of the anet a6 before you can even start printing, the printer has to be calibrated. Dort könnt ihr dann anschließend auch die neuen werte eintragen und abspeichern. Xsteps/mm 100 ysteps/mm 100 zsteps/mm 400 ?? Anet a8 / a6 achsen kalibrieren. Copy paste the folder called 'anet' there. Installing firmware that is editable. (it's in the files as 'anet hardware file with optiboot.zip') if you open arduino, you should be able to select the 'anet v1,0' board. 24.09.2017 · with anet a6 in default, without calibration :. So, yesterday i bought my 1st 3d filament refill (pla) and printed this temparture calibration tower to see what's the best temperature for my anet a8.

// otherwise this would lead to the heater being powered on all the time. // otherwise this would lead to the heater being powered on all the time. Konfiguration speichern die steps im eeprom fest hinterlegen. So, yesterday i bought my 1st 3d filament refill (pla) and printed this temparture calibration tower to see what's the best temperature for my anet a8. // the minimal temperature defines the temperature below which the heater will not be enabled it is used // to check that the wiring to the thermistor is not broken. Dort könnt ihr dann anschließend auch die neuen werte eintragen und abspeichern. Results measured with a mitutoyo absolute digimatic caterpillar: (it's in the files as 'anet hardware file with optiboot.zip') if you open arduino, you should be able to select the 'anet v1,0' board. 24.09.2017 · with anet a6 in default, without calibration : Xsteps/mm 100 ysteps/mm 100 zsteps/mm 400 ?? Copy paste the folder called 'anet' there. Dort könnt ihr dann anschließend auch die neuen werte eintragen und abspeichern.

(it's in the files as 'anet hardware file with optiboot.zip') if you open arduino, you should be able to select the 'anet v1,0' board. Slowly move the print bed until the nozzle is right above the next corner of the bed. Dort könnt ihr dann anschließend auch die neuen werte eintragen und abspeichern. Copy paste the folder called 'anet' there. 480 * 400 * 400mm. Xsteps/mm 100 ysteps/mm 100 zsteps/mm 400 ??. Copy paste the folder called 'anet' there.

Not sure, default at least. Slowly move the print bed until the nozzle is right above the next corner of the bed. Copy paste the folder called 'anet' there. 24.09.2017 · with anet a6 in default, without calibration : (it's in the files as 'anet hardware file with optiboot.zip') if you open arduino, you should be able to select the 'anet v1,0' board. Letztlich ist eine kalibrierung unserer achsen vom anet a8 und a6 nur eine überprüfung derer, um den möglichen fehler eines nicht exakten verfahrweges auszuschließen. Dort könnt ihr dann anschließend auch die neuen werte eintragen und abspeichern. The z and x axes must run parallel, the heat bed of the y axis must be in the lead and the distance between the nozzle and the heating bed must also be adjusted... Letztlich ist eine kalibrierung unserer achsen vom anet a8 und a6 nur eine überprüfung derer, um den möglichen fehler eines nicht exakten verfahrweges auszuschließen.
480 * 400 * 400mm.. The z and x axes must run parallel, the heat bed of the y axis must be in the lead and the distance between the nozzle and the heating bed must also be adjusted. Slowly move the print bed until the nozzle is right above the next corner of the bed. Results measured with a mitutoyo absolute digimatic caterpillar: Dort könnt ihr dann anschließend auch die neuen werte eintragen und abspeichern. 02.07.2019 · the full list of steps i used to remove the heated bed functionality from my anet a6 printer: 24.09.2017 · with anet a6 in default, without calibration : Dort könnt ihr dann anschließend auch die neuen werte eintragen und abspeichern.

// the minimal temperature defines the temperature below which the heater will not be enabled it is used // to check that the wiring to the thermistor is not broken. 02.07.2019 · the full list of steps i used to remove the heated bed functionality from my anet a6 printer: Copy paste the folder called 'anet' there. 480 * 400 * 400mm. Installing firmware that is editable. Results measured with a mitutoyo absolute digimatic caterpillar: 04.10.2018 · calibration of the anet a6 before you can even start printing, the printer has to be calibrated... 480 * 400 * 400mm.

04.10.2018 · calibration of the anet a6 before you can even start printing, the printer has to be calibrated. The z and x axes must run parallel, the heat bed of the y axis must be in the lead and the distance between the nozzle and the heating bed must also be adjusted. 04.10.2018 · calibration of the anet a6 before you can even start printing, the printer has to be calibrated. // the minimal temperature defines the temperature below which the heater will not be enabled it is used // to check that the wiring to the thermistor is not broken. // otherwise this would lead to the heater being powered on all the time. Slowly move the print bed until the nozzle is right above the next corner of the bed. Copy paste the folder called 'anet' there. 24.09.2017 · with anet a6 in default, without calibration :

So, yesterday i bought my 1st 3d filament refill (pla) and printed this temparture calibration tower to see what's the best temperature for my anet a8.. Installing firmware that is editable. Dort könnt ihr dann anschließend auch die neuen werte eintragen und abspeichern. Konfiguration speichern die steps im eeprom fest hinterlegen. Copy paste the folder called 'anet' there. (it's in the files as 'anet hardware file with optiboot.zip') if you open arduino, you should be able to select the 'anet v1,0' board. 480 * 400 * 400mm. Install arduino, go to my documents 'arduino' and create a folder hardware if it doesnt exist. Not sure, default at least. So, yesterday i bought my 1st 3d filament refill (pla) and printed this temparture calibration tower to see what's the best temperature for my anet a8. 04.10.2018 · calibration of the anet a6 before you can even start printing, the printer has to be calibrated... Letztlich ist eine kalibrierung unserer achsen vom anet a8 und a6 nur eine überprüfung derer, um den möglichen fehler eines nicht exakten verfahrweges auszuschließen.

Slowly move the print bed until the nozzle is right above the next corner of the bed. 480 * 400 * 400mm. 02.07.2019 · the full list of steps i used to remove the heated bed functionality from my anet a6 printer:.. Anet a8 / a6 achsen kalibrieren.

Slowly move the print bed until the nozzle is right above the next corner of the bed. Anet a8 / a6 achsen kalibrieren. Konfiguration speichern die steps im eeprom fest hinterlegen. Xsteps/mm 100 ysteps/mm 100 zsteps/mm 400 ?? Letztlich ist eine kalibrierung unserer achsen vom anet a8 und a6 nur eine überprüfung derer, um den möglichen fehler eines nicht exakten verfahrweges auszuschließen. Results measured with a mitutoyo absolute digimatic caterpillar: Copy paste the folder called 'anet' there. Not sure, default at least... Results measured with a mitutoyo absolute digimatic caterpillar:

So, yesterday i bought my 1st 3d filament refill (pla) and printed this temparture calibration tower to see what's the best temperature for my anet a8.. . Slowly move the print bed until the nozzle is right above the next corner of the bed.
The z and x axes must run parallel, the heat bed of the y axis must be in the lead and the distance between the nozzle and the heating bed must also be adjusted. So, yesterday i bought my 1st 3d filament refill (pla) and printed this temparture calibration tower to see what's the best temperature for my anet a8. Not sure, default at least. (it's in the files as 'anet hardware file with optiboot.zip') if you open arduino, you should be able to select the 'anet v1,0' board. 04.10.2018 · calibration of the anet a6 before you can even start printing, the printer has to be calibrated. Slowly move the print bed until the nozzle is right above the next corner of the bed. Now the print bed is roughly leveled and we proceed to calibrate the inductive sensor... So, yesterday i bought my 1st 3d filament refill (pla) and printed this temparture calibration tower to see what's the best temperature for my anet a8.

24.09.2017 · with anet a6 in default, without calibration :. Dort könnt ihr dann anschließend auch die neuen werte eintragen und abspeichern. The z and x axes must run parallel, the heat bed of the y axis must be in the lead and the distance between the nozzle and the heating bed must also be adjusted. So, yesterday i bought my 1st 3d filament refill (pla) and printed this temparture calibration tower to see what's the best temperature for my anet a8... So, yesterday i bought my 1st 3d filament refill (pla) and printed this temparture calibration tower to see what's the best temperature for my anet a8.

480 * 400 * 400mm... Not sure, default at least. Install arduino, go to my documents 'arduino' and create a folder hardware if it doesnt exist. // otherwise this would lead to the heater being powered on all the time. (it's in the files as 'anet hardware file with optiboot.zip') if you open arduino, you should be able to select the 'anet v1,0' board. 04.10.2018 · calibration of the anet a6 before you can even start printing, the printer has to be calibrated. 02.07.2019 · the full list of steps i used to remove the heated bed functionality from my anet a6 printer: 480 * 400 * 400mm.. Not sure, default at least.

(it's in the files as 'anet hardware file with optiboot.zip') if you open arduino, you should be able to select the 'anet v1,0' board. Copy paste the folder called 'anet' there. // otherwise this would lead to the heater being powered on all the time. So, yesterday i bought my 1st 3d filament refill (pla) and printed this temparture calibration tower to see what's the best temperature for my anet a8. 24.09.2017 · with anet a6 in default, without calibration : Not sure, default at least. 02.07.2019 · the full list of steps i used to remove the heated bed functionality from my anet a6 printer: (it's in the files as 'anet hardware file with optiboot.zip') if you open arduino, you should be able to select the 'anet v1,0' board. Copy paste the folder called 'anet' there.

Installing firmware that is editable. 480 * 400 * 400mm. Installing firmware that is editable. Not sure, default at least. // the minimal temperature defines the temperature below which the heater will not be enabled it is used // to check that the wiring to the thermistor is not broken. 24.09.2017 · with anet a6 in default, without calibration :.. 24.09.2017 · with anet a6 in default, without calibration :

Dort könnt ihr dann anschließend auch die neuen werte eintragen und abspeichern... 02.07.2019 · the full list of steps i used to remove the heated bed functionality from my anet a6 printer: The z and x axes must run parallel, the heat bed of the y axis must be in the lead and the distance between the nozzle and the heating bed must also be adjusted. Konfiguration speichern die steps im eeprom fest hinterlegen. Copy paste the folder called 'anet' there. Slowly move the print bed until the nozzle is right above the next corner of the bed. 480 * 400 * 400mm. 24.09.2017 · with anet a6 in default, without calibration :.. Slowly move the print bed until the nozzle is right above the next corner of the bed.

// the minimal temperature defines the temperature below which the heater will not be enabled it is used // to check that the wiring to the thermistor is not broken... Not sure, default at least. Dort könnt ihr dann anschließend auch die neuen werte eintragen und abspeichern.. Install arduino, go to my documents 'arduino' and create a folder hardware if it doesnt exist.

(it's in the files as 'anet hardware file with optiboot.zip') if you open arduino, you should be able to select the 'anet v1,0' board. So, yesterday i bought my 1st 3d filament refill (pla) and printed this temparture calibration tower to see what's the best temperature for my anet a8. Results measured with a mitutoyo absolute digimatic caterpillar: Copy paste the folder called 'anet' there. Xsteps/mm 100 ysteps/mm 100 zsteps/mm 400 ?? Installing firmware that is editable. The z and x axes must run parallel, the heat bed of the y axis must be in the lead and the distance between the nozzle and the heating bed must also be adjusted. Now the print bed is roughly leveled and we proceed to calibrate the inductive sensor. Slowly move the print bed until the nozzle is right above the next corner of the bed. // the minimal temperature defines the temperature below which the heater will not be enabled it is used // to check that the wiring to the thermistor is not broken... Konfiguration speichern die steps im eeprom fest hinterlegen.

(it's in the files as 'anet hardware file with optiboot.zip') if you open arduino, you should be able to select the 'anet v1,0' board.. 480 * 400 * 400mm. Installing firmware that is editable. 24.09.2017 · with anet a6 in default, without calibration : // otherwise this would lead to the heater being powered on all the time. // the minimal temperature defines the temperature below which the heater will not be enabled it is used // to check that the wiring to the thermistor is not broken. Dort könnt ihr dann anschließend auch die neuen werte eintragen und abspeichern. (it's in the files as 'anet hardware file with optiboot.zip') if you open arduino, you should be able to select the 'anet v1,0' board. Xsteps/mm 100 ysteps/mm 100 zsteps/mm 400 ?? Install arduino, go to my documents 'arduino' and create a folder hardware if it doesnt exist.. Konfiguration speichern die steps im eeprom fest hinterlegen.

Slowly move the print bed until the nozzle is right above the next corner of the bed... // otherwise this would lead to the heater being powered on all the time. Slowly move the print bed until the nozzle is right above the next corner of the bed. (it's in the files as 'anet hardware file with optiboot.zip') if you open arduino, you should be able to select the 'anet v1,0' board. Anet a8 / a6 achsen kalibrieren. Xsteps/mm 100 ysteps/mm 100 zsteps/mm 400 ?? 04.10.2018 · calibration of the anet a6 before you can even start printing, the printer has to be calibrated. 02.07.2019 · the full list of steps i used to remove the heated bed functionality from my anet a6 printer:. Not sure, default at least.

Results measured with a mitutoyo absolute digimatic caterpillar: Copy paste the folder called 'anet' there. 24.09.2017 · with anet a6 in default, without calibration : // the minimal temperature defines the temperature below which the heater will not be enabled it is used // to check that the wiring to the thermistor is not broken. 02.07.2019 · the full list of steps i used to remove the heated bed functionality from my anet a6 printer: Anet a8 / a6 achsen kalibrieren. Install arduino, go to my documents 'arduino' and create a folder hardware if it doesnt exist. Installing firmware that is editable. 04.10.2018 · calibration of the anet a6 before you can even start printing, the printer has to be calibrated.. Results measured with a mitutoyo absolute digimatic caterpillar:

480 * 400 * 400mm. 24.09.2017 · with anet a6 in default, without calibration :. Not sure, default at least.

Dort könnt ihr dann anschließend auch die neuen werte eintragen und abspeichern. Now the print bed is roughly leveled and we proceed to calibrate the inductive sensor. // the minimal temperature defines the temperature below which the heater will not be enabled it is used // to check that the wiring to the thermistor is not broken. Anet a8 / a6 achsen kalibrieren. (it's in the files as 'anet hardware file with optiboot.zip') if you open arduino, you should be able to select the 'anet v1,0' board. // otherwise this would lead to the heater being powered on all the time. Dort könnt ihr dann anschließend auch die neuen werte eintragen und abspeichern. Xsteps/mm 100 ysteps/mm 100 zsteps/mm 400 ?? Not sure, default at least. Slowly move the print bed until the nozzle is right above the next corner of the bed.. // otherwise this would lead to the heater being powered on all the time.

Xsteps/mm 100 ysteps/mm 100 zsteps/mm 400 ??.. Now the print bed is roughly leveled and we proceed to calibrate the inductive sensor. Letztlich ist eine kalibrierung unserer achsen vom anet a8 und a6 nur eine überprüfung derer, um den möglichen fehler eines nicht exakten verfahrweges auszuschließen. Install arduino, go to my documents 'arduino' and create a folder hardware if it doesnt exist. 02.07.2019 · the full list of steps i used to remove the heated bed functionality from my anet a6 printer: The z and x axes must run parallel, the heat bed of the y axis must be in the lead and the distance between the nozzle and the heating bed must also be adjusted. Dort könnt ihr dann anschließend auch die neuen werte eintragen und abspeichern. Xsteps/mm 100 ysteps/mm 100 zsteps/mm 400 ?? Results measured with a mitutoyo absolute digimatic caterpillar: // the minimal temperature defines the temperature below which the heater will not be enabled it is used // to check that the wiring to the thermistor is not broken.. 02.07.2019 · the full list of steps i used to remove the heated bed functionality from my anet a6 printer:

Konfiguration speichern die steps im eeprom fest hinterlegen... // the minimal temperature defines the temperature below which the heater will not be enabled it is used // to check that the wiring to the thermistor is not broken. Results measured with a mitutoyo absolute digimatic caterpillar: The z and x axes must run parallel, the heat bed of the y axis must be in the lead and the distance between the nozzle and the heating bed must also be adjusted. 04.10.2018 · calibration of the anet a6 before you can even start printing, the printer has to be calibrated. 480 * 400 * 400mm. Konfiguration speichern die steps im eeprom fest hinterlegen. 24.09.2017 · with anet a6 in default, without calibration : (it's in the files as 'anet hardware file with optiboot.zip') if you open arduino, you should be able to select the 'anet v1,0' board. Copy paste the folder called 'anet' there. So, yesterday i bought my 1st 3d filament refill (pla) and printed this temparture calibration tower to see what's the best temperature for my anet a8.. 04.10.2018 · calibration of the anet a6 before you can even start printing, the printer has to be calibrated.

480 * 400 * 400mm. Letztlich ist eine kalibrierung unserer achsen vom anet a8 und a6 nur eine überprüfung derer, um den möglichen fehler eines nicht exakten verfahrweges auszuschließen. Not sure, default at least.. Now the print bed is roughly leveled and we proceed to calibrate the inductive sensor.

24.09.2017 · with anet a6 in default, without calibration : Now the print bed is roughly leveled and we proceed to calibrate the inductive sensor. Slowly move the print bed until the nozzle is right above the next corner of the bed. Dort könnt ihr dann anschließend auch die neuen werte eintragen und abspeichern. So, yesterday i bought my 1st 3d filament refill (pla) and printed this temparture calibration tower to see what's the best temperature for my anet a8. Copy paste the folder called 'anet' there. Xsteps/mm 100 ysteps/mm 100 zsteps/mm 400 ??. Now the print bed is roughly leveled and we proceed to calibrate the inductive sensor.

Dort könnt ihr dann anschließend auch die neuen werte eintragen und abspeichern. // otherwise this would lead to the heater being powered on all the time. 24.09.2017 · with anet a6 in default, without calibration : Not sure, default at least. Slowly move the print bed until the nozzle is right above the next corner of the bed. Copy paste the folder called 'anet' there.. The z and x axes must run parallel, the heat bed of the y axis must be in the lead and the distance between the nozzle and the heating bed must also be adjusted.

(it's in the files as 'anet hardware file with optiboot.zip') if you open arduino, you should be able to select the 'anet v1,0' board... Install arduino, go to my documents 'arduino' and create a folder hardware if it doesnt exist. 04.10.2018 · calibration of the anet a6 before you can even start printing, the printer has to be calibrated.. // otherwise this would lead to the heater being powered on all the time.

Results measured with a mitutoyo absolute digimatic caterpillar: 04.10.2018 · calibration of the anet a6 before you can even start printing, the printer has to be calibrated. Copy paste the folder called 'anet' there. // the minimal temperature defines the temperature below which the heater will not be enabled it is used // to check that the wiring to the thermistor is not broken. Results measured with a mitutoyo absolute digimatic caterpillar: (it's in the files as 'anet hardware file with optiboot.zip') if you open arduino, you should be able to select the 'anet v1,0' board. Anet a8 / a6 achsen kalibrieren. Results measured with a mitutoyo absolute digimatic caterpillar:

Anet a8 / a6 achsen kalibrieren. So, yesterday i bought my 1st 3d filament refill (pla) and printed this temparture calibration tower to see what's the best temperature for my anet a8. Install arduino, go to my documents 'arduino' and create a folder hardware if it doesnt exist. (it's in the files as 'anet hardware file with optiboot.zip') if you open arduino, you should be able to select the 'anet v1,0' board. Dort könnt ihr dann anschließend auch die neuen werte eintragen und abspeichern.

Letztlich ist eine kalibrierung unserer achsen vom anet a8 und a6 nur eine überprüfung derer, um den möglichen fehler eines nicht exakten verfahrweges auszuschließen. 480 * 400 * 400mm. Install arduino, go to my documents 'arduino' and create a folder hardware if it doesnt exist. Copy paste the folder called 'anet' there. Anet a8 / a6 achsen kalibrieren. // otherwise this would lead to the heater being powered on all the time. 24.09.2017 · with anet a6 in default, without calibration : Not sure, default at least. // the minimal temperature defines the temperature below which the heater will not be enabled it is used // to check that the wiring to the thermistor is not broken. Slowly move the print bed until the nozzle is right above the next corner of the bed. Dort könnt ihr dann anschließend auch die neuen werte eintragen und abspeichern.

The z and x axes must run parallel, the heat bed of the y axis must be in the lead and the distance between the nozzle and the heating bed must also be adjusted.. Not sure, default at least. Konfiguration speichern die steps im eeprom fest hinterlegen. Now the print bed is roughly leveled and we proceed to calibrate the inductive sensor. (it's in the files as 'anet hardware file with optiboot.zip') if you open arduino, you should be able to select the 'anet v1,0' board. Copy paste the folder called 'anet' there... 480 * 400 * 400mm.

Installing firmware that is editable.. 24.09.2017 · with anet a6 in default, without calibration : Dort könnt ihr dann anschließend auch die neuen werte eintragen und abspeichern. 04.10.2018 · calibration of the anet a6 before you can even start printing, the printer has to be calibrated. So, yesterday i bought my 1st 3d filament refill (pla) and printed this temparture calibration tower to see what's the best temperature for my anet a8.. 480 * 400 * 400mm.

04.10.2018 · calibration of the anet a6 before you can even start printing, the printer has to be calibrated... Letztlich ist eine kalibrierung unserer achsen vom anet a8 und a6 nur eine überprüfung derer, um den möglichen fehler eines nicht exakten verfahrweges auszuschließen.

24.09.2017 · with anet a6 in default, without calibration :.. . Installing firmware that is editable.

The z and x axes must run parallel, the heat bed of the y axis must be in the lead and the distance between the nozzle and the heating bed must also be adjusted. Xsteps/mm 100 ysteps/mm 100 zsteps/mm 400 ?? 02.07.2019 · the full list of steps i used to remove the heated bed functionality from my anet a6 printer: Installing firmware that is editable. Install arduino, go to my documents 'arduino' and create a folder hardware if it doesnt exist.. Dort könnt ihr dann anschließend auch die neuen werte eintragen und abspeichern.

Not sure, default at least... Slowly move the print bed until the nozzle is right above the next corner of the bed. Xsteps/mm 100 ysteps/mm 100 zsteps/mm 400 ?? (it's in the files as 'anet hardware file with optiboot.zip') if you open arduino, you should be able to select the 'anet v1,0' board. Letztlich ist eine kalibrierung unserer achsen vom anet a8 und a6 nur eine überprüfung derer, um den möglichen fehler eines nicht exakten verfahrweges auszuschließen. 480 * 400 * 400mm.

(it's in the files as 'anet hardware file with optiboot.zip') if you open arduino, you should be able to select the 'anet v1,0' board.. The z and x axes must run parallel, the heat bed of the y axis must be in the lead and the distance between the nozzle and the heating bed must also be adjusted. 480 * 400 * 400mm. 02.07.2019 · the full list of steps i used to remove the heated bed functionality from my anet a6 printer: Dort könnt ihr dann anschließend auch die neuen werte eintragen und abspeichern. // otherwise this would lead to the heater being powered on all the time.. Install arduino, go to my documents 'arduino' and create a folder hardware if it doesnt exist.

So, yesterday i bought my 1st 3d filament refill (pla) and printed this temparture calibration tower to see what's the best temperature for my anet a8. The z and x axes must run parallel, the heat bed of the y axis must be in the lead and the distance between the nozzle and the heating bed must also be adjusted. Installing firmware that is editable. Install arduino, go to my documents 'arduino' and create a folder hardware if it doesnt exist.. Dort könnt ihr dann anschließend auch die neuen werte eintragen und abspeichern.

Dort könnt ihr dann anschließend auch die neuen werte eintragen und abspeichern. The z and x axes must run parallel, the heat bed of the y axis must be in the lead and the distance between the nozzle and the heating bed must also be adjusted. Konfiguration speichern die steps im eeprom fest hinterlegen. Installing firmware that is editable. Dort könnt ihr dann anschließend auch die neuen werte eintragen und abspeichern. Xsteps/mm 100 ysteps/mm 100 zsteps/mm 400 ?? Letztlich ist eine kalibrierung unserer achsen vom anet a8 und a6 nur eine überprüfung derer, um den möglichen fehler eines nicht exakten verfahrweges auszuschließen. Xsteps/mm 100 ysteps/mm 100 zsteps/mm 400 ??

Installing firmware that is editable... Install arduino, go to my documents 'arduino' and create a folder hardware if it doesnt exist. Konfiguration speichern die steps im eeprom fest hinterlegen. Not sure, default at least. Anet a8 / a6 achsen kalibrieren. 24.09.2017 · with anet a6 in default, without calibration :

The z and x axes must run parallel, the heat bed of the y axis must be in the lead and the distance between the nozzle and the heating bed must also be adjusted. 24.09.2017 · with anet a6 in default, without calibration : Konfiguration speichern die steps im eeprom fest hinterlegen. Xsteps/mm 100 ysteps/mm 100 zsteps/mm 400 ?? // the minimal temperature defines the temperature below which the heater will not be enabled it is used // to check that the wiring to the thermistor is not broken. (it's in the files as 'anet hardware file with optiboot.zip') if you open arduino, you should be able to select the 'anet v1,0' board. Dort könnt ihr dann anschließend auch die neuen werte eintragen und abspeichern. Slowly move the print bed until the nozzle is right above the next corner of the bed. 04.10.2018 · calibration of the anet a6 before you can even start printing, the printer has to be calibrated. // the minimal temperature defines the temperature below which the heater will not be enabled it is used // to check that the wiring to the thermistor is not broken.

Letztlich ist eine kalibrierung unserer achsen vom anet a8 und a6 nur eine überprüfung derer, um den möglichen fehler eines nicht exakten verfahrweges auszuschließen. Install arduino, go to my documents 'arduino' and create a folder hardware if it doesnt exist. // otherwise this would lead to the heater being powered on all the time. So, yesterday i bought my 1st 3d filament refill (pla) and printed this temparture calibration tower to see what's the best temperature for my anet a8... Now the print bed is roughly leveled and we proceed to calibrate the inductive sensor.

The z and x axes must run parallel, the heat bed of the y axis must be in the lead and the distance between the nozzle and the heating bed must also be adjusted. 480 * 400 * 400mm. Install arduino, go to my documents 'arduino' and create a folder hardware if it doesnt exist. Dort könnt ihr dann anschließend auch die neuen werte eintragen und abspeichern. (it's in the files as 'anet hardware file with optiboot.zip') if you open arduino, you should be able to select the 'anet v1,0' board. Now the print bed is roughly leveled and we proceed to calibrate the inductive sensor. Results measured with a mitutoyo absolute digimatic caterpillar:.. 02.07.2019 · the full list of steps i used to remove the heated bed functionality from my anet a6 printer:
// otherwise this would lead to the heater being powered on all the time. (it's in the files as 'anet hardware file with optiboot.zip') if you open arduino, you should be able to select the 'anet v1,0' board. 04.10.2018 · calibration of the anet a6 before you can even start printing, the printer has to be calibrated. Copy paste the folder called 'anet' there. 24.09.2017 · with anet a6 in default, without calibration : Letztlich ist eine kalibrierung unserer achsen vom anet a8 und a6 nur eine überprüfung derer, um den möglichen fehler eines nicht exakten verfahrweges auszuschließen. Dort könnt ihr dann anschließend auch die neuen werte eintragen und abspeichern. Konfiguration speichern die steps im eeprom fest hinterlegen. 480 * 400 * 400mm. Results measured with a mitutoyo absolute digimatic caterpillar:. Results measured with a mitutoyo absolute digimatic caterpillar:

02.07.2019 · the full list of steps i used to remove the heated bed functionality from my anet a6 printer:.. 480 * 400 * 400mm. Dort könnt ihr dann anschließend auch die neuen werte eintragen und abspeichern. 04.10.2018 · calibration of the anet a6 before you can even start printing, the printer has to be calibrated. Install arduino, go to my documents 'arduino' and create a folder hardware if it doesnt exist. Installing firmware that is editable. // otherwise this would lead to the heater being powered on all the time. Konfiguration speichern die steps im eeprom fest hinterlegen.

02.07.2019 · the full list of steps i used to remove the heated bed functionality from my anet a6 printer: Xsteps/mm 100 ysteps/mm 100 zsteps/mm 400 ?? 480 * 400 * 400mm. Not sure, default at least. The z and x axes must run parallel, the heat bed of the y axis must be in the lead and the distance between the nozzle and the heating bed must also be adjusted. Install arduino, go to my documents 'arduino' and create a folder hardware if it doesnt exist. (it's in the files as 'anet hardware file with optiboot.zip') if you open arduino, you should be able to select the 'anet v1,0' board. Anet a8 / a6 achsen kalibrieren. Dort könnt ihr dann anschließend auch die neuen werte eintragen und abspeichern. 24.09.2017 · with anet a6 in default, without calibration : Konfiguration speichern die steps im eeprom fest hinterlegen.. 02.07.2019 · the full list of steps i used to remove the heated bed functionality from my anet a6 printer:

(it's in the files as 'anet hardware file with optiboot.zip') if you open arduino, you should be able to select the 'anet v1,0' board. Dort könnt ihr dann anschließend auch die neuen werte eintragen und abspeichern. The z and x axes must run parallel, the heat bed of the y axis must be in the lead and the distance between the nozzle and the heating bed must also be adjusted. 02.07.2019 · the full list of steps i used to remove the heated bed functionality from my anet a6 printer: Now the print bed is roughly leveled and we proceed to calibrate the inductive sensor.. (it's in the files as 'anet hardware file with optiboot.zip') if you open arduino, you should be able to select the 'anet v1,0' board.

24.09.2017 · with anet a6 in default, without calibration : Not sure, default at least. Installing firmware that is editable. Now the print bed is roughly leveled and we proceed to calibrate the inductive sensor. So, yesterday i bought my 1st 3d filament refill (pla) and printed this temparture calibration tower to see what's the best temperature for my anet a8. // otherwise this would lead to the heater being powered on all the time. Letztlich ist eine kalibrierung unserer achsen vom anet a8 und a6 nur eine überprüfung derer, um den möglichen fehler eines nicht exakten verfahrweges auszuschließen. Copy paste the folder called 'anet' there. Results measured with a mitutoyo absolute digimatic caterpillar: 480 * 400 * 400mm.

Installing firmware that is editable. The z and x axes must run parallel, the heat bed of the y axis must be in the lead and the distance between the nozzle and the heating bed must also be adjusted. The z and x axes must run parallel, the heat bed of the y axis must be in the lead and the distance between the nozzle and the heating bed must also be adjusted.

Copy paste the folder called 'anet' there. Not sure, default at least. Konfiguration speichern die steps im eeprom fest hinterlegen. Xsteps/mm 100 ysteps/mm 100 zsteps/mm 400 ??. 02.07.2019 · the full list of steps i used to remove the heated bed functionality from my anet a6 printer:

Installing firmware that is editable. Dort könnt ihr dann anschließend auch die neuen werte eintragen und abspeichern. 04.10.2018 · calibration of the anet a6 before you can even start printing, the printer has to be calibrated. // otherwise this would lead to the heater being powered on all the time. 480 * 400 * 400mm. Slowly move the print bed until the nozzle is right above the next corner of the bed. Anet a8 / a6 achsen kalibrieren.

Install arduino, go to my documents 'arduino' and create a folder hardware if it doesnt exist. Copy paste the folder called 'anet' there. 480 * 400 * 400mm. // otherwise this would lead to the heater being powered on all the time. Letztlich ist eine kalibrierung unserer achsen vom anet a8 und a6 nur eine überprüfung derer, um den möglichen fehler eines nicht exakten verfahrweges auszuschließen. The z and x axes must run parallel, the heat bed of the y axis must be in the lead and the distance between the nozzle and the heating bed must also be adjusted. Not sure, default at least. 04.10.2018 · calibration of the anet a6 before you can even start printing, the printer has to be calibrated. Now the print bed is roughly leveled and we proceed to calibrate the inductive sensor. Konfiguration speichern die steps im eeprom fest hinterlegen... Now the print bed is roughly leveled and we proceed to calibrate the inductive sensor.

480 * 400 * 400mm. Slowly move the print bed until the nozzle is right above the next corner of the bed. Not sure, default at least. Xsteps/mm 100 ysteps/mm 100 zsteps/mm 400 ?? So, yesterday i bought my 1st 3d filament refill (pla) and printed this temparture calibration tower to see what's the best temperature for my anet a8. // the minimal temperature defines the temperature below which the heater will not be enabled it is used // to check that the wiring to the thermistor is not broken. Konfiguration speichern die steps im eeprom fest hinterlegen.

So, yesterday i bought my 1st 3d filament refill (pla) and printed this temparture calibration tower to see what's the best temperature for my anet a8... The z and x axes must run parallel, the heat bed of the y axis must be in the lead and the distance between the nozzle and the heating bed must also be adjusted. // otherwise this would lead to the heater being powered on all the time. 480 * 400 * 400mm. Letztlich ist eine kalibrierung unserer achsen vom anet a8 und a6 nur eine überprüfung derer, um den möglichen fehler eines nicht exakten verfahrweges auszuschließen.. Letztlich ist eine kalibrierung unserer achsen vom anet a8 und a6 nur eine überprüfung derer, um den möglichen fehler eines nicht exakten verfahrweges auszuschließen.

Copy paste the folder called 'anet' there. Slowly move the print bed until the nozzle is right above the next corner of the bed. Letztlich ist eine kalibrierung unserer achsen vom anet a8 und a6 nur eine überprüfung derer, um den möglichen fehler eines nicht exakten verfahrweges auszuschließen. The z and x axes must run parallel, the heat bed of the y axis must be in the lead and the distance between the nozzle and the heating bed must also be adjusted.. So, yesterday i bought my 1st 3d filament refill (pla) and printed this temparture calibration tower to see what's the best temperature for my anet a8.

Xsteps/mm 100 ysteps/mm 100 zsteps/mm 400 ?? Konfiguration speichern die steps im eeprom fest hinterlegen. Slowly move the print bed until the nozzle is right above the next corner of the bed. So, yesterday i bought my 1st 3d filament refill (pla) and printed this temparture calibration tower to see what's the best temperature for my anet a8. Not sure, default at least. (it's in the files as 'anet hardware file with optiboot.zip') if you open arduino, you should be able to select the 'anet v1,0' board.

Results measured with a mitutoyo absolute digimatic caterpillar: So, yesterday i bought my 1st 3d filament refill (pla) and printed this temparture calibration tower to see what's the best temperature for my anet a8. Results measured with a mitutoyo absolute digimatic caterpillar: Letztlich ist eine kalibrierung unserer achsen vom anet a8 und a6 nur eine überprüfung derer, um den möglichen fehler eines nicht exakten verfahrweges auszuschließen. Installing firmware that is editable. 02.07.2019 · the full list of steps i used to remove the heated bed functionality from my anet a6 printer:. 04.10.2018 · calibration of the anet a6 before you can even start printing, the printer has to be calibrated.

Dort könnt ihr dann anschließend auch die neuen werte eintragen und abspeichern... Installing firmware that is editable.. Copy paste the folder called 'anet' there.
// the minimal temperature defines the temperature below which the heater will not be enabled it is used // to check that the wiring to the thermistor is not broken... So, yesterday i bought my 1st 3d filament refill (pla) and printed this temparture calibration tower to see what's the best temperature for my anet a8. // otherwise this would lead to the heater being powered on all the time. Dort könnt ihr dann anschließend auch die neuen werte eintragen und abspeichern. Copy paste the folder called 'anet' there. The z and x axes must run parallel, the heat bed of the y axis must be in the lead and the distance between the nozzle and the heating bed must also be adjusted. 24.09.2017 · with anet a6 in default, without calibration :

Results measured with a mitutoyo absolute digimatic caterpillar:. The z and x axes must run parallel, the heat bed of the y axis must be in the lead and the distance between the nozzle and the heating bed must also be adjusted. Now the print bed is roughly leveled and we proceed to calibrate the inductive sensor.. Now the print bed is roughly leveled and we proceed to calibrate the inductive sensor.

Slowly move the print bed until the nozzle is right above the next corner of the bed.. 480 * 400 * 400mm. // otherwise this would lead to the heater being powered on all the time.. Not sure, default at least.

Slowly move the print bed until the nozzle is right above the next corner of the bed.. So, yesterday i bought my 1st 3d filament refill (pla) and printed this temparture calibration tower to see what's the best temperature for my anet a8. Konfiguration speichern die steps im eeprom fest hinterlegen. Dort könnt ihr dann anschließend auch die neuen werte eintragen und abspeichern. (it's in the files as 'anet hardware file with optiboot.zip') if you open arduino, you should be able to select the 'anet v1,0' board. Letztlich ist eine kalibrierung unserer achsen vom anet a8 und a6 nur eine überprüfung derer, um den möglichen fehler eines nicht exakten verfahrweges auszuschließen. Install arduino, go to my documents 'arduino' and create a folder hardware if it doesnt exist. So, yesterday i bought my 1st 3d filament refill (pla) and printed this temparture calibration tower to see what's the best temperature for my anet a8.

480 * 400 * 400mm. Konfiguration speichern die steps im eeprom fest hinterlegen. 480 * 400 * 400mm. 02.07.2019 · the full list of steps i used to remove the heated bed functionality from my anet a6 printer: 24.09.2017 · with anet a6 in default, without calibration : // otherwise this would lead to the heater being powered on all the time. Letztlich ist eine kalibrierung unserer achsen vom anet a8 und a6 nur eine überprüfung derer, um den möglichen fehler eines nicht exakten verfahrweges auszuschließen. Now the print bed is roughly leveled and we proceed to calibrate the inductive sensor. Installing firmware that is editable. Copy paste the folder called 'anet' there.. Results measured with a mitutoyo absolute digimatic caterpillar:

